Start your knitted blanket today and bring more coziness to your living room.
Ad
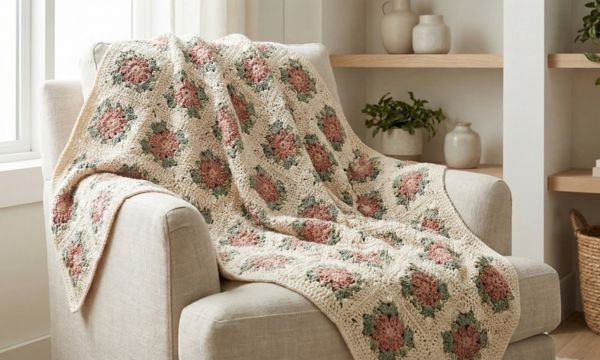
Have you ever imagined walking into the living room, throwing yourself onto the couch, and wrapping up in a knitted blanket made by you?
It may sound like something from Pinterest, but I promise you: it is more possible than you imagine.
Ad
A knitted blanket has that cozy charm that transforms any little corner.
And the best part is that while you knit, you already start to feel proud stitch by stitch.
Ad
In the end, you will realize that starting your blanket is much less complicated than it seemed. Shall we begin?
Materials Needed for your Knitted Blanket
Before you start knitting, let’s organize the basics. Having the right materials makes the process much easier and prevents frustration halfway through.

To start your blanket, you will need:
- Thick yarn or wool suitable for the project, preferably soft and comfortable to the touch
- Needles compatible with the yarn thickness, to ensure well defined stitches
- Sharp scissors to cut the yarn precisely
- Measuring tape to measure the blanket size correctly
- Tapestry needle to create a clean finish and hide the yarn ends
If this is your first blanket, you do not need to invest in anything too sophisticated.
How to Choose Thick Yarn (Chunky Knit)
Ah, the famous chunky knit… that big, cozy yarn that makes you want to hug it.
It is perfect for those who want a knitted blanket with a modern look and strong visual impact.
Thick yarn creates more defined stitches and makes the blanket grow quickly.
And that is wonderful for beginners, because you see progress almost instantly.
When choosing, notice:
- Soft and comfortable texture
- Good resistance when pulled
- A color that matches your living room
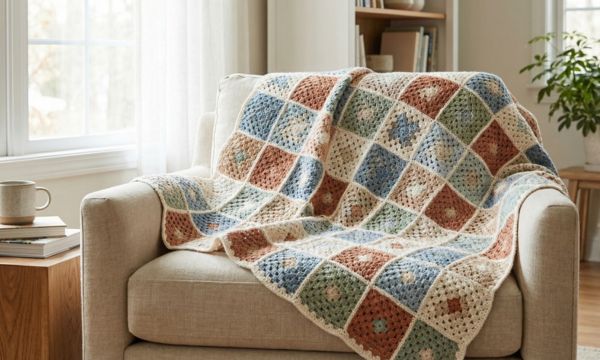
A blanket in a neutral tone brings elegance. A vibrant color becomes the focal point of the décor. This is where your personal style comes in!
Defining the Ideal Blanket Size
Before casting on stitches, it is worth deciding: is this knitted blanket for the couch? For using on your lap? Or to cover two people during a movie?
Some common sizes are:
- Lap blanket: approximately 1.20 m x 1.20 m
- Couch blanket: around 1.30 m x 1.80 m
- Larger decorative blanket: up to 2 meters in length
The secret here is to carefully measure the space where the blanket will stay before starting.
This helps you better plan the proportions and prevents it from ending up too small or larger than necessary.
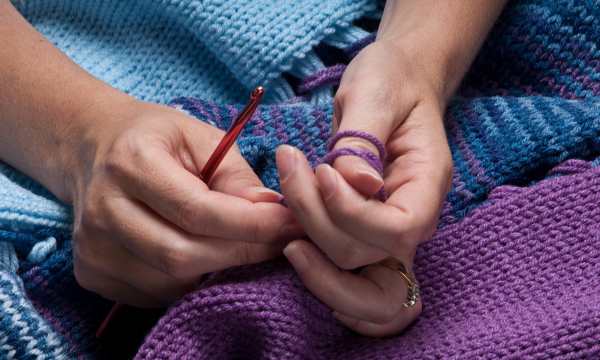
Step by Step to Start the Blanket
Now comes the best part: getting your hands to work and seeing the first stitches appear.
Take a deep breath, adjust the yarn in your hands, and let’s start calmly, because this moment deserves to be enjoyed.
- Step 1: Cast On the Stitches
Begin by making the initial cast on according to the width you defined.
Do not worry if it is not perfect at first, the yarn tension naturally adjusts as you practice.
- Step 2: Choose a Simple Base Stitch
To make it easier, choose a basic stitch, such as garter stitch or stockinette stitch.
Keeping a single pattern at the beginning helps create a more uniform and elegant look, and gives more confidence to those just starting out.
- Step 3: Knit Row by Row
Now continue calmly, working row by row. The focus here is not speed, but consistency and rhythm.
When you find your own pace, the work flows and each stitch begins to come to life.
Keeping Stitches Even and Well Defined
If there is one thing that gives the blanket a professional look, it is stitch consistency. But relax, this does not come automatically.
Try to maintain the same tension on the yarn throughout the process. Not too tight, not too loose.
A practical tip is to pay attention to your hand position and the movement you make when passing the yarn.
Small adjustments create more regular stitches and prevent excessive tension.
When you find a comfortable, almost automatic rhythm, everything starts to flow better. If you notice uneven stitches, do not panic.
Finishing and Final Touches
Now comes the most satisfying moment: finishing your blanket! This is when it takes on the look of a finished piece.
Bind off the stitches carefully, maintaining the same tension used throughout the blanket. Then, hide the yarn ends with the tapestry needle.
You can choose:
- A simple garter stitch border
- A more defined decorative border
- Fringes at the ends
- A final row in a contrasting color
These details turn your knitted blanket into something even more special.
How to Use the Blanket in Living Room Décor
Now tell me: is there anything cozier than tossing your knitted blanket folded over the arm of the couch?
It can be used:
- Over the back of the couch, creating a cozy and inviting look
- Folded on the side, allowing a natural and elegant drape
- Spread over an armchair, adding highlight and texture to the corner
- Combined with cushions in the same tone, forming a harmonious and balanced composition
Besides comfort, the knitted blanket adds texture and depth to the space. It is that detail that makes the living room look like it came from a magazine.

Tips for Beginners to Avoid Mistakes
Honestly speaking: making mistakes is part of the process, and that is completely normal.
But it is possible to avoid some common missteps in your knitted blanket and make the journey smoother.
Do not start with overly complex stitches right away. Well done basics already look beautiful and help you build confidence with each row.
Avoid changing tension in the middle of the project, tightening or loosening the yarn too much.
This can make the blanket uneven and affect the final result.
And most importantly, do not give up in the first few rows.
Conclusion
Every knitted blanket starts off looking a little strange, a little “will this even work?”, and suddenly… it blooms and everything begins to make sense.
Without a doubt, making your own knitted blanket is more than creating a decorative piece.
It is creating something with your hands, in your own time, with your energy.
Because when we create, the house becomes an extension of the heart.